 For suburban homeowners, rain gardens have emerged as a popular and practical landscaping solution, offering a range of benefits that resonate with their lifestyles and environmental values. As neighborhoods expand and more impervious surfaces like driveways, sidewalks, and rooftops cover the land, the management of stormwater runoff becomes a pressing concern. In this context, rain gardens present a sustainable and visually appealing alternative, allowing suburban residents to play an active role in managing rainwater responsibly.
What is a Rain Garden?
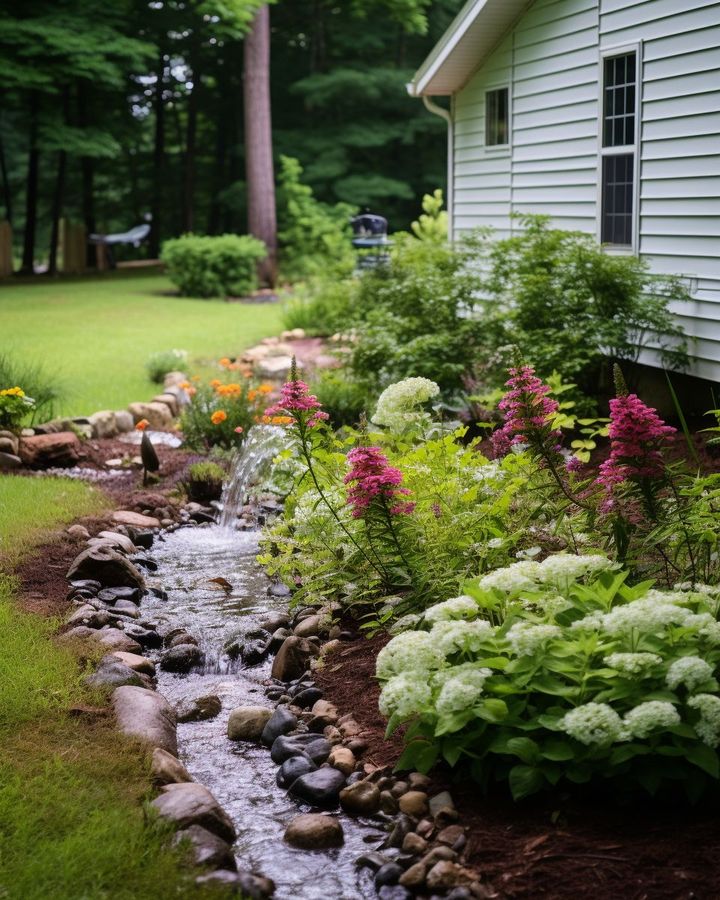
A rain garden is a strategically designed and landscaped depression in the ground that captures and filters rainwater from rooftops, driveways, and other impermeable surfaces. It functions as a natural sponge, absorbing and purifying stormwater runoff before it flows into storm drains or reaches nearby water bodies. This process not only reduces the volume and speed of runoff but also filters out pollutants, preventing them from harming the environment and water quality.
ADVERTISEMENT
In the article below, we guide you on creating a rain garden in your yard:
Materials Required:
Decorative rocks and boulders
Native plants and grasses Landscape fabric River rock PVC pipe Tools Required: Wheelbarrow, Spade, Level
Step 1: Plan and Design
Choose the Location: Select a suitable spot in your yard where water naturally flows during rain events or where downspouts discharge. Ensure it’s at least 10 feet away from your home’s foundation and clear of utility lines or septic systems.
Design the Rain Garden: To determine the size of your rain garden, consider the drainage area’s square footage from rooftops, driveways, and other impervious surfaces. Calculate the average runoff volume during a typical rainfall event, assess the soil’s infiltration rate, and factor in local rainfall patterns. Aim for a rain garden that can handle approximately 10% of the total runoff from the contributing area, ensuring effective stormwater management and environmental benefits. Additionally, check local guidelines and regulations for any specific requirements in your area.
Step 2: Prepare the Site
Clear the Area: Remove any existing vegetation, rocks, or debris from the marked rain garden area using a spade and a wheelbarrow.
Excavate the Basin: Dig the depression for the rain garden using the spade, aiming for a depth of 4 to 8 inches. Ensure the basin’s bottom is level to facilitate even water distribution.
To determine the depth of a rain garden, consider factors like soil type, drainage capacity, and the volume of water it needs to handle. Aim for a depth of 4 to 8 inches, as this range allows for optimal water infiltration and plant growth. Conduct a percolation test to assess soil drainage, ensuring the rain garden can effectively manage stormwater runoff. The depth should also align with the surrounding landscape to prevent water pooling and create a natural, aesthetically pleasing feature in your yard.
Step 3: Install PVC Pipe
Pipe Placement: If you want to direct water from downspouts into the rain garden, lay PVC pipes in the excavation to create a conduit for the water flow.
Position Outlet: Place the PVC pipe’s outlet end in the lower section of the rain garden to allow for proper drainage.
Step 4: Lay Landscape Fabric
Install the Fabric: Line the basin with landscape fabric, cutting it to fit neatly along the edges. This fabric will help suppress weed growth and prevent soil erosion.
Step 5: Add River Rock and Rocks
Add River Rock: Fill the rain garden basin with a layer of 1-1/2-inch river rock. This layer will improve drainage and enhance the garden’s aesthetic appeal.
Arrange Decorative Rocks: Place decorative rocks and boulders strategically around the garden to create focal points and add visual interest.
Step 6: Select and Plant Native Plants
Choose Native Plants: Research and select native plants and grasses that are well-suited to your region’s climate and water conditions. These plants require less maintenance and support local biodiversity.
Planting Layout: Arrange the plants in groups, considering their water tolerance levels.
While specific plant choices depend on the region, some standard options include aster, iris, sedum, daylily, artemisia, coneflower, and sedge. Ensure the selected plants have “average to moist” water requirements for the deeper parts of the rain garden, while those thriving in “average to dry” conditions should be positioned on the higher edges. Avoid moisture-loving plants, as the rain garden is designed to drain within 24 hours, leaving such plants high and dry.
Step 7: Mulch and Water
Apply Mulch: Spread a layer of organic mulch around the plants to retain moisture, suppress weeds, and protect the roots.
Water the Plants: Water the newly planted rain garden thoroughly, and continue to water as needed until the plants are established.
Step 8: Maintain Your Rain Garden
Regular Maintenance: Remove weeds regularly to keep the rain garden healthy and thriving. Prune and divide plants as necessary to maintain their growth.
|
Build a rain garden in your yard with this step-by-step guide