
How to make a homemade drip sprinkler: 10 cents is enough
DIY Drip Sprinkler for Efficient Plant Watering: Embrace the Spring Greenery

As spring unfolds, the diligent care of our vegetable patches and gardens becomes a top priority. Ensuring an adequate water supply for our plants is crucial for fostering their health and vitality. In this guide, we will explore the creation of a DIY drip sprinkler, a cost-effective solution to meet the watering needs of your green companions.
The Significance of Proper Irrigation
- Essential Watering Practices:
- Achieving lush and vibrant plants necessitates an efficient irrigation strategy. With the advent of spring, both seasoned gardeners and novices are compelled to nurture their plants, gearing up for the warmth of sunny days.
- Introducing the Drip Irrigator:
- A fundamental requirement for the plants in your vegetable patch and garden is a consistent water supply. Daily watering might be impractical, leading us to explore alternative and automated solutions, such as the drip irrigator.
- Functionality of a Drip Sprinkler:
- The drip sprinkler operates as an irrigation system that delivers water directly to the plant roots through a network of pipes and drippers. Its mechanism involves flexible tubes strategically positioned near the roots, ensuring a gradual and constant release of water.
- Efficient Water Distribution:
- This method allows for the precise adjustment of water flow based on plant needs and prevailing climatic conditions. Significantly, the drip sprinkler utilizes minimal water resources more effectively for each plant, curbing waste due to evaporation and surface runoff.
- Reduced Disease Risk:
- Additionally, this irrigation approach minimizes the risk of plant diseases, as water is directed straight to the roots, avoiding wetting leaves and flowers. Excessive water use, if not properly managed, can lead to stagnation, fostering plant pathologies.

Crafting Your DIY Drip Sprinkler
- Required Materials:
- To embark on this DIY project, gather two 500ml plastic bottles. Adjust the bottle size as needed; larger plants may require one-liter or two-liter bottles. Employ a pair of scissors to make an incision approximately four fingers below the bottle’s neck, cutting off only one of the bottles.
- Assembly Process:
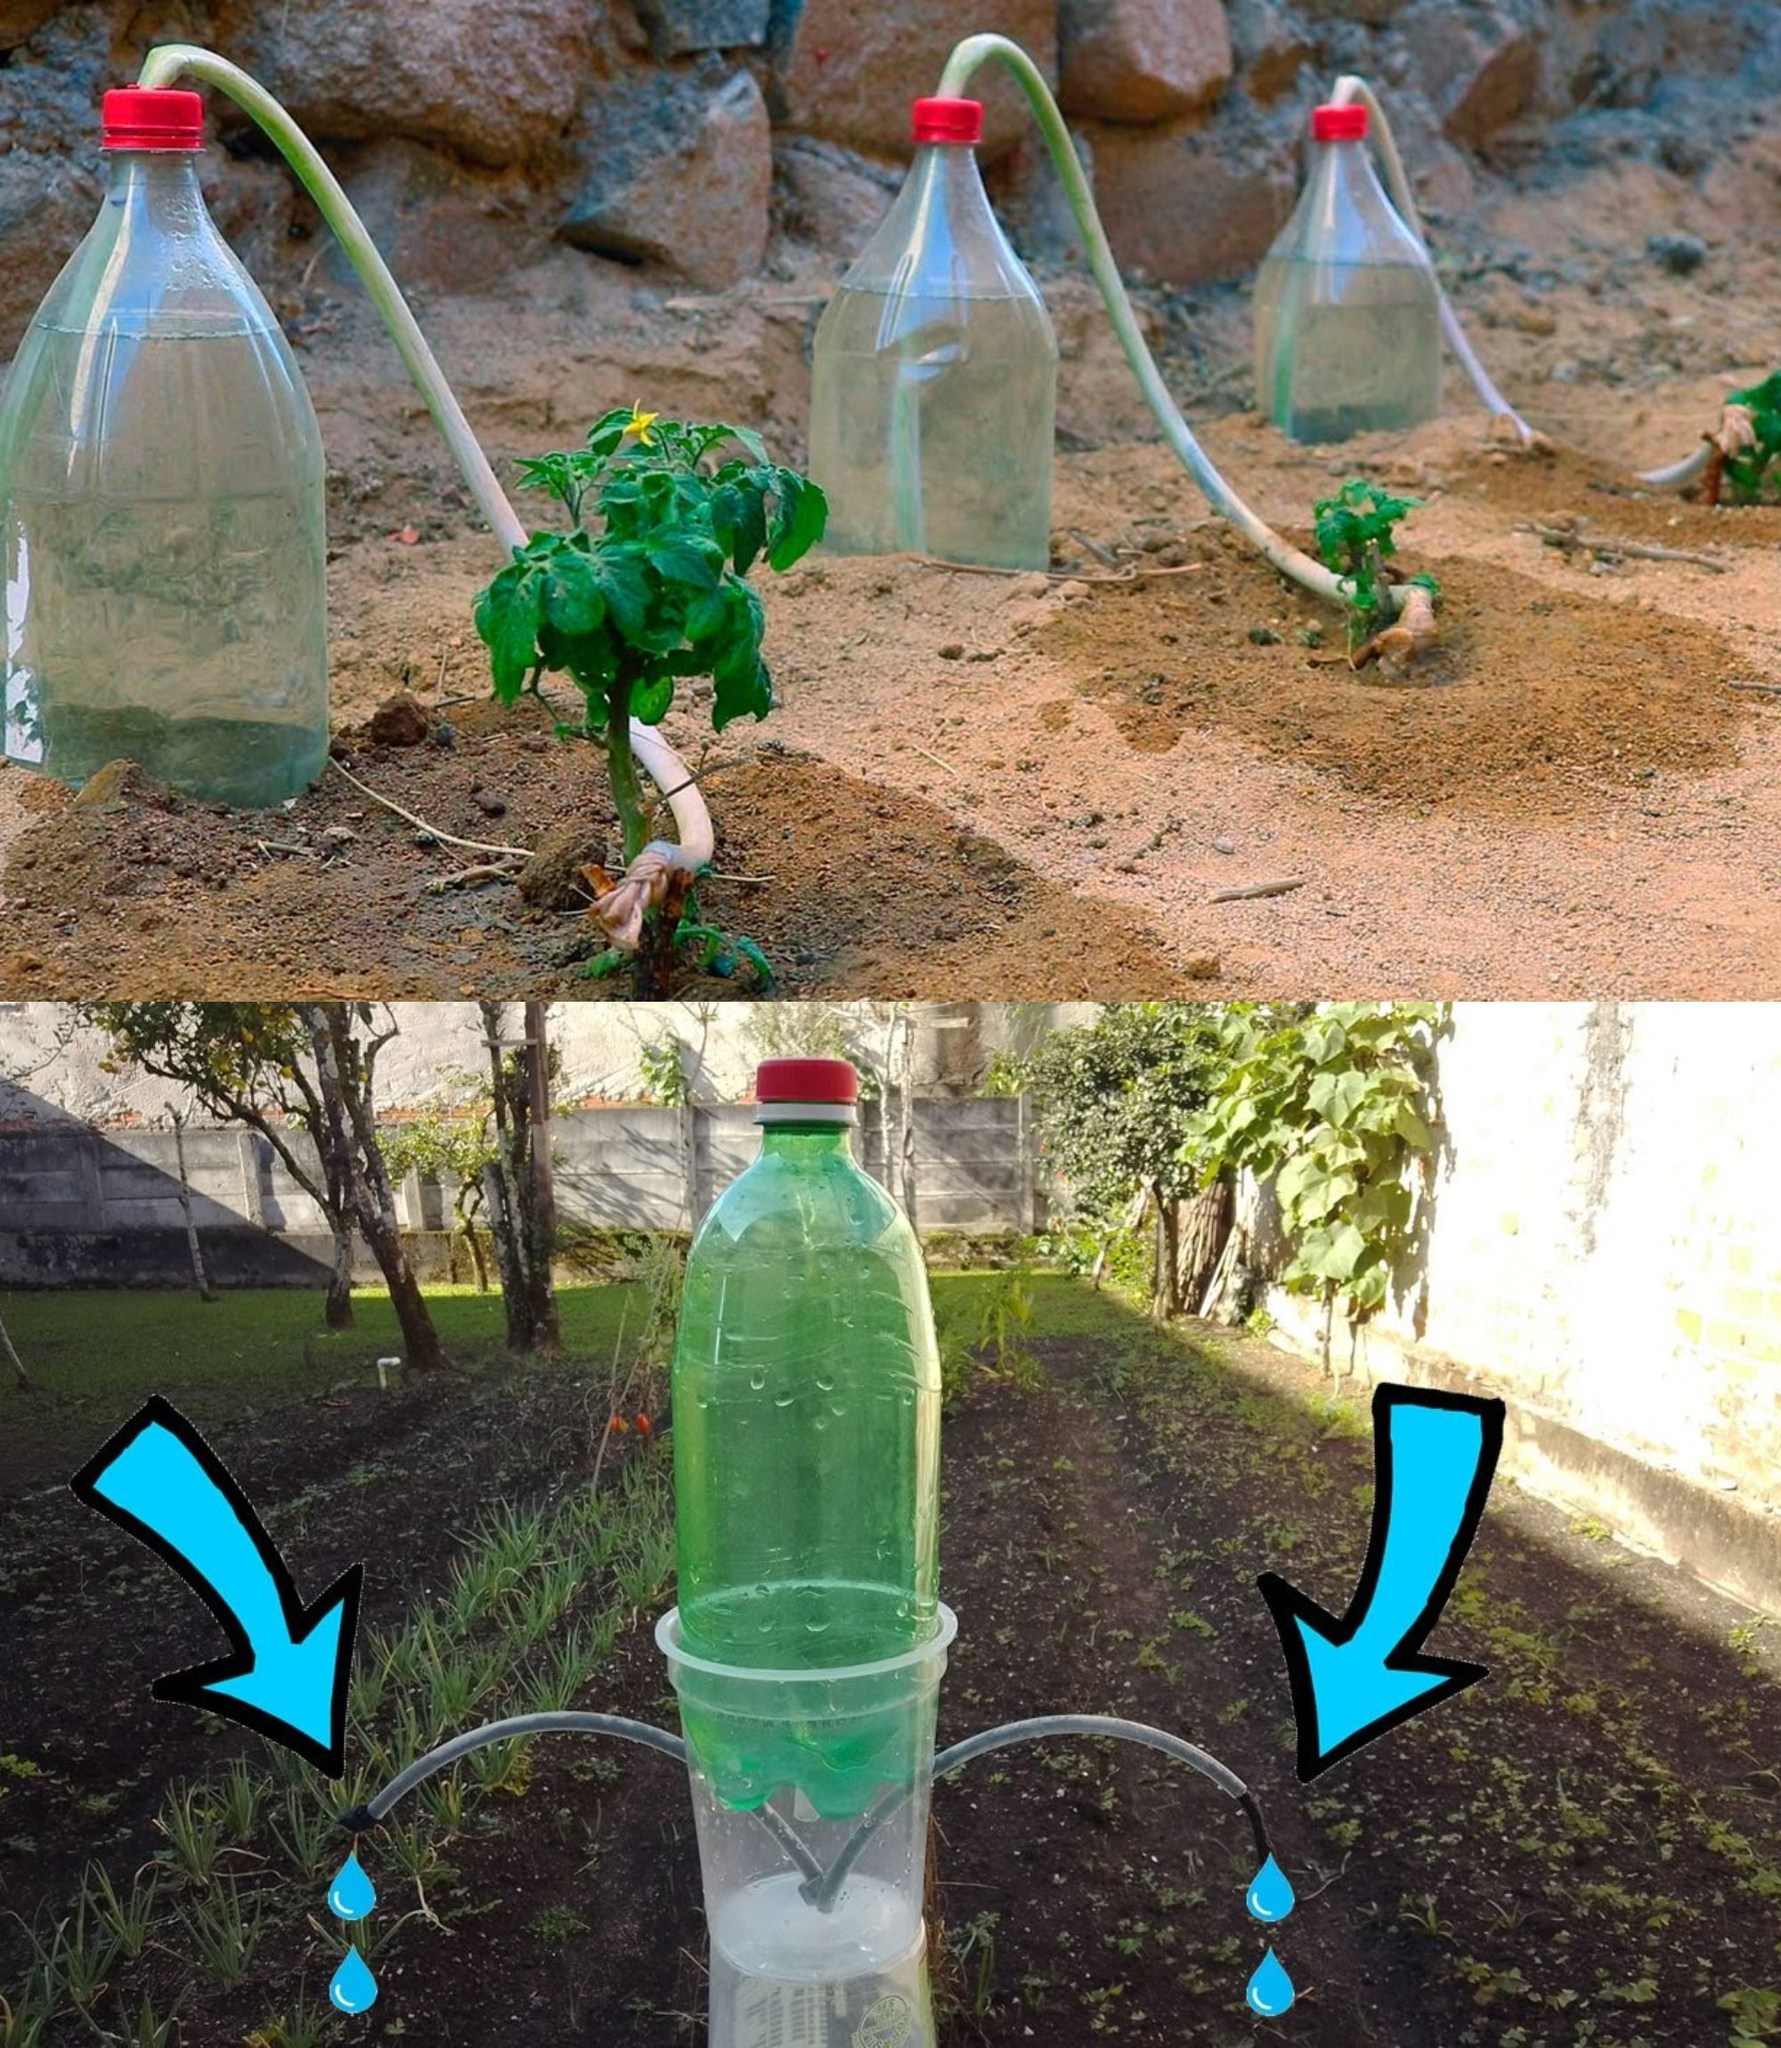
- Invert the uncut bottle into the cut one to serve as a water reservoir. Mark the base of the cut bottle and create a hole with scissors. Insert a flexible tube into the hole and thread galvanized wire through the tube, securing it with a screw to add rigidity.
- Implementation of the Drip System:
- Fill the uncut bottle with water, place it upside down in the cut bottle with the inserted tube, and observe as the drip sprinkler initiates a steady drip. This DIY solution facilitates continuous watering for approximately 120 hours, requiring only a minimal investment of a little over ten cents.